

Assembling an L-shaped desk can enhance your workspace efficiency and comfort. Proper assembly ensures stability and functionality, making it essential to follow clear instructions carefully. This guide provides a step-by-step approach to help you successfully assemble your L-shaped desk with ease and confidence.
Overview of L-Shaped Desk Assembly
Assembling an L-shaped desk involves a structured process that requires attention to detail and proper organization. The desk typically consists of a main frame, a desktop surface, and additional components like drawers or shelves. The assembly begins with unpacking and inventorying all parts, followed by constructing the main frame and attaching the desktop. Additional features, such as cable management systems, are installed to enhance functionality. The process may vary depending on the desk’s design and complexity, but most instructions emphasize the importance of following step-by-step guidelines to ensure stability and correct alignment. Customization options, like choosing the return side, allow users to tailor the desk to their workspace needs. Proper preparation and safety precautions are crucial for a smooth assembly experience.
Importance of Proper Assembly
Proper assembly of an L-shaped desk is crucial for ensuring stability, safety, and optimal functionality. A well-assembled desk prevents wobbling, structural weaknesses, and potential safety hazards. Improper assembly can lead to a shortened lifespan of the desk and may result in damage to components. Following the manufacturer’s instructions carefully ensures that all parts are securely fastened and aligned correctly. This attention to detail guarantees the desk meets ergonomic standards and supports productivity. Additionally, proper assembly prevents costly repairs and extends the durability of the desk. By adhering to the guidelines, users can enjoy a sturdy, reliable, and aesthetically pleasing workspace tailored to their needs.

Tools and Materials Required
Essential tools include an Allen wrench, screwdriver, and bolts. Materials provided are desktop surfaces, frames, and hardware like washers and screws for secure assembly.
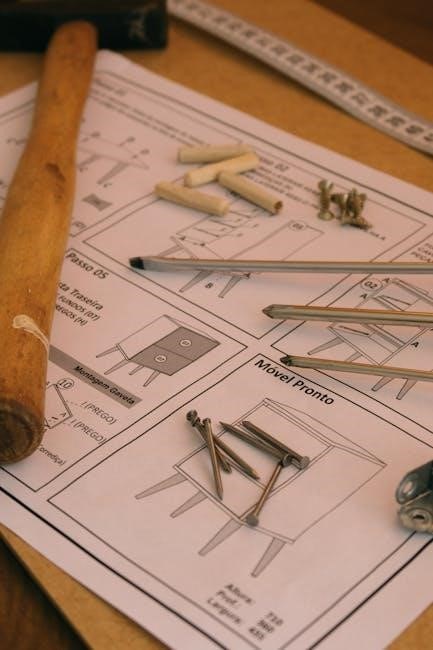
Essential Tools for Assembly
The assembly process requires specific tools to ensure everything fits securely. An Allen wrench is crucial for tightening bolts and screws. A screwdriver (both Phillips and flathead) may be needed for additional hardware. Other essential tools include a rubber mallet for tapping parts into place and a measuring tape for accurate alignment. Some kits also include wrenches and hex keys. Always refer to the provided toolkit, as most desks come with necessary tools. Double-check the toolkit before starting to avoid delays. Proper use of these tools ensures a smooth and safe assembly experience. Follow instructions carefully to prevent damage or misalignment.
Materials Included in the Package
Your L-shaped desk package typically includes all necessary components for assembly. These materials are carefully packaged to ensure safe delivery. The package contains the main desk frame, desktop surface, support legs, and any additional features like drawers or shelves. Hardware such as screws, bolts, and Allen wrenches is also provided. A comprehensive instruction manual is included, detailing each step of the assembly process. Some desks may also include cable management systems or pre-installed fittings. Always verify the contents against the parts list in the manual to ensure nothing is missing. Proper organization of these materials will streamline the assembly process and prevent delays. Double-checking the inventory helps avoid issues during construction.
Pre-Assembly Preparation
Pre-assembly preparation involves clearing a spacious workspace and ensuring good lighting. Unpack all components carefully, checking against the parts list to confirm everything is included and undamaged. Organize tools and materials, and be cautious with fragile components to ensure a smooth assembly process.
Unpacking and Inventory Check
Begin by carefully unpacking all components from the packaging. Check for any loose small parts that may have shifted during shipping. Compare the contents with the provided parts list to ensure everything is included and undamaged. Organize the components logically, grouping similar parts together. This step is crucial for avoiding delays during assembly. Pay special attention to hardware like screws and bolts, as they are often packed separately. Use the instruction manual or assembly guide to identify each part if needed. Once verified, you can proceed confidently to the next step. Proper organization will streamline the assembly process and reduce the risk of missing items.
Workspace Setup and Safety Precautions
Before starting assembly, clear a large, flat workspace to accommodate all components. Cover the floor or work surface with a soft blanket or protective covering to prevent scratching or damage. Ensure good lighting and ventilation for visibility and comfort. Gather all tools and materials within easy reach. It is recommended to have at least two people to assist with lifting and stabilizing heavy parts. Wear safety gloves and protective eyewear to avoid injury from sharp edges or tools. Avoid working in a cluttered or uneven area, as this can increase the risk of accidents. Double-check that all components are included and undamaged before proceeding. Proper workspace setup and safety precautions will ensure a smooth and incident-free assembly process.
Step-by-Step Assembly Instructions
Assemble your L-shaped desk with a systematic approach. Start by attaching legs, aligning the frame, and securing the desktop. Install drawers, shelves, and cable management systems next. Follow the manual step-by-step, using the provided toolkit. Allow 1-2 hours for completion, depending on complexity. Having a second person assist can make the process smoother and ensure a sturdy, durable workspace.
Assembling the Main Frame
Begin by unpacking the main frame components, including legs, side rails, and crossbars. Attach the legs to the frame using the provided screws and washers, ensuring they are securely tightened. Align the corners precisely and use the Allen wrench to fasten them. Next, connect the side rails to the legs, making sure they are evenly spaced and level. Use the crossbars to reinforce the frame’s stability. Tighten all bolts firmly but avoid overtightening. Double-check the alignment and ensure all parts are properly secured. If the frame feels unstable, adjust the legs or re-examine the connections. A sturdy main frame is crucial for the overall durability of your L-shaped desk.
For added stability, ensure all bolts are tightened evenly. If unsure, refer to the assembly manual for diagrams or instructions. This step typically requires about 30 minutes to an hour to complete, depending on the complexity of the design. Proper alignment is key to preventing wobbling or unevenness in the final structure. Once the main frame is assembled correctly, you can proceed to attach the desktop surface and additional components. Always follow the manufacturer’s instructions for specific assembly requirements, as designs may vary slightly. A well-assembled frame ensures a solid foundation for your workspace.
Attaching the Desktop Surface
Once the main frame is assembled, carefully place the desktop surface onto the frame, ensuring it aligns with the pre-drilled holes. Use the screws provided to secure the desktop to the frame, starting from the center and working outward to avoid warping. Tighten the screws firmly but avoid overtightening, as this could damage the material. Ensure the desktop is flush with the frame edges for a seamless appearance. If the desktop has a return or curved section, align it according to the manufacturer’s instructions. Double-check that all screws are tightened evenly and the surface is stable. For added stability, consider attaching any included brackets or supports. Finally, verify that the desktop is level and properly secured before proceeding to the next steps.
This step is crucial for ensuring the desk’s surface is even and durable. Proper alignment prevents uneven wear and ensures optimal usability. If the desktop feels loose, re-examine the connections and tighten as needed. Some models may require additional adhesive or sealing for a polished finish. Always refer to the provided assembly manual for specific instructions tailored to your L-shaped desk model.
Installing Additional Components (Drawers, Shelves)
After assembling the main frame and attaching the desktop, proceed to install any additional components such as drawers or shelves. Begin by unpacking these components and identifying the corresponding hardware. Align the drawer glides or shelf brackets with the pre-drilled holes on the desk frame. Use the provided screws to secure these components tightly. For drawers, ensure proper alignment with the glides to guarantee smooth operation. For shelves, verify they are level and evenly spaced. Once installed, test the drawers by sliding them in and out to ensure they function smoothly. Double-check that all screws are tightened firmly to prevent any instability. Proper installation of these components enhances the desk’s functionality and organization.
If shelves or drawers do not fit perfectly, adjust their positioning slightly and re-tighten the screws. Ensure all hardware is securely fastened to maintain the desk’s structural integrity. Avoid overloading shelves or drawers beyond their recommended capacity to prevent damage. Refer to the assembly manual for specific instructions on handling custom or adjustable components. This step completes the core assembly, readying the desk for use.
Securing Cable Management Systems
Organizing cables is essential for a tidy and functional workspace. Begin by identifying the cable management components, such as cable ties, clips, or trays, included in your package. Attach these to the desk frame using screws or adhesive backing, following the manufacturer’s instructions. Route cables through the clips or trays, ensuring they are neatly arranged and not pinched by moving parts. Secure loose ends with cable ties to prevent tangling. For desks with built-in cable management systems, such as grommets or USB ports, ensure all cords are properly threaded and secured. This step not only enhances the desk’s appearance but also improves safety and accessibility. Double-check that all cables are tightly fastened to avoid damage or tripping hazards. A well-organized cable system ensures long-term functionality and a professional-looking setup.
Troubleshooting Common Issues
Common issues during assembly include missing parts, misalignment, and hardware malfunctions. Always double-check the inventory and instructions. If parts are damaged or missing, contact the manufacturer immediately for replacements; Ensure all components are properly aligned before tightening screws. If hardware issues arise, refer to the troubleshooting section in the manual or seek professional assistance. Properly addressing these issues ensures a stable and functional desk setup.
Identifying Missing or Damaged Parts
Before starting the assembly, carefully inspect all components for any damage or discrepancies. Compare the parts with the provided parts list in the manual to ensure everything is included. If any items are missing or damaged, contact the manufacturer immediately for replacements. Organize the parts by their labels or codes to avoid confusion. Pay special attention to small hardware like screws and washers, as they can easily be overlooked. If a part is damaged, do not attempt to use it, as this could compromise the desk’s stability. Properly identifying and addressing these issues early on ensures a smoother assembly process and prevents delays.
Resolving Misalignment or Hardware Issues
If during assembly you notice misalignment or hardware issues, stop and reassess. Check for proper alignment of frames and surfaces using a level. If parts do not fit, ensure screws are tightened evenly and hardware is correctly oriented. Loosen any over-tightened components and adjust gradually. For stripped screws, apply wood glue or replace the screw if possible. Misalignment can often be corrected by repositioning parts or using shims. If issues persist, refer to the manual or contact customer support for assistance. Addressing these problems early prevents further complications and ensures a sturdy, functional desk. Patience and careful adjustment are key to resolving hardware and alignment challenges effectively.

Final Inspection and Testing
After assembly, inspect the desk for stability and ensure all parts are securely attached. Check for any damage or wear. Test all functional components, like drawers and height adjustments, to confirm proper operation. Verify the surface is level and even. Address any remaining issues before final use to ensure safety and durability. A thorough inspection guarantees your L-shaped desk is ready for everyday use and meets your workspace needs effectively.
Ensuring Stability and Leveling
Stability and leveling are crucial for the proper functioning and longevity of your L-shaped desk. Begin by placing the desk on a firm, even surface. Use a spirit level to check the desktop and frame alignment. Adjust the desk legs or feet as needed to achieve balance. If the floor is uneven, consider using shims or adjustable feet to stabilize the desk. Ensure all joints and connections are tightly secured to prevent wobbling. Double-check that the desktop surface is evenly aligned and level, as an uneven surface can lead to discomfort during use or damage over time. Proper leveling ensures optimal ergonomics and prevents potential structural issues.
Verifying All Components Are Secure
After completing the assembly, thoroughly inspect the L-shaped desk to ensure all components are securely fastened. Check that all bolts, screws, and connectors are tightened properly, as loose parts can compromise stability. Examine the desktop surface, drawers, shelves, and cable management systems to confirm they are firmly attached and functioning correctly. Verify that all moving parts, such as drawers and shelves, operate smoothly without wobbling or misalignment. Ensure that the frame is rigid and free from any play. Double-check that all hardware, including cam locks and brackets, is securely engaged. This final inspection ensures the desk is safe, durable, and ready for daily use, preventing potential issues down the line.

Post-Assembly Tips
Dispose of packaging materials responsibly and clean the workspace. Regularly wipe the desk surface with a soft cloth and avoid harsh chemicals to maintain its finish and durability.
Disposal of Packaging Materials
After completing the assembly, carefully dispose of all packaging materials. Ensure no small parts are accidentally discarded. Recycle cardboard, paper, and plastic materials when possible. For bulky items like Styrofoam, check local recycling guidelines. Properly handle sharp objects and hardware to avoid injury. Consider donating unused packaging materials if feasible. Eco-friendly disposal helps reduce environmental impact. Ensure the workspace is clean and free from debris for a professional setup. Always follow local waste management regulations for responsible disposal. This step ensures a safe and organized workspace, completing the assembly process effectively.
Caring for the Desk Surface
To maintain the appearance and functionality of your L-shaped desk, regular care is essential. Avoid placing hot or sharp objects directly on the surface; use coasters or mats to protect it. Clean the desk with a soft, damp cloth, avoiding harsh chemicals or abrasive cleaners that could damage the finish. For wood or laminate surfaces, consider applying a protective wax or polish periodically. Ensure the desk is dry after cleaning to prevent water spots. Avoid exposing the desk to direct sunlight for extended periods, as it may cause fading or warping. By following these simple care tips, you can preserve the quality and longevity of your desk surface.