

Ingredients:
- 2 cups of milk (whole, 2%, 1%, or fat-free cow’s milk, goat milk, coconut milk, soy milk, almond milk, or rice milk)
- 1 cup of instant pudding mix
- 1 tablespoon of vanilla extract (optional, for enhanced flavor)
- 1/4 teaspoon of salt (optional, to balance sweetness)
- 1/4 teaspoon of nutmeg (optional, for a hint of spice)
These ingredients combine to create a smooth and creamy pudding․ The milk provides the base, while the pudding mix adds flavor and thickening agents․ Vanilla extract, salt, and nutmeg can be added to customize the taste․ For a richer texture, you can substitute half-and-half or a combination of milk and cream for part of the milk․ This recipe serves 4 people and can be prepared in about 10 minutes․ Adjust the proportions as needed for larger or smaller batches․

Equipment:
To prepare instant pudding mix, you’ll need a few essential pieces of equipment to ensure the process goes smoothly and the pudding turns out creamy and well-mixed․ Below is a list of the necessary tools and their roles in making the perfect pudding:
- Large Mixing Bowl: A sturdy, clean mixing bowl is the foundation for combining the milk and pudding mix․ It should be large enough to hold all the ingredients without spilling during whisking․ Glass or stainless steel bowls are ideal because they are easy to clean and can handle both cold and warm mixtures․
- Wire Whip or Whisk: A wire whip or whisk is essential for blending the pudding mix with the milk․ It helps dissolve the powder evenly and incorporates air, which ensures a smooth texture․ Look for a sturdy whisk with flexible wires that can handle thick mixtures without bending․
- Measuring Cups: Accurate measurements are crucial for achieving the right consistency․ Use a 2-cup measuring cup for the milk and a 1-cup measuring cup for the pudding mix․ Clear, graduated measuring cups are the best choice for precise measurements․
- Measuring Spoons: If you’re adding optional ingredients like vanilla extract, salt, or nutmeg, measuring spoons will help you portion them correctly․ Stainless steel or plastic spoons with clear markings are ideal for this purpose․
- Saucepan (Optional): While many instant pudding mixes can be prepared cold, some recipes require heating the mixture on the stovetop to thicken․ In such cases, a medium-sized saucepan is necessary․ Choose one with a heavy bottom to prevent scorching and ensure even heating․
- Spoon or Silicone Spatula: A spoon or silicone spatula is useful for scraping the sides of the bowl or saucepan to ensure no pudding mix sticks and goes to waste․ It’s also handy for serving the pudding once it’s ready․
- Electric Mixer or Hand Mixer (Optional): For an extra-smooth pudding, you can use an electric mixer or hand mixer․ This is especially useful if you’re adding extra ingredients like whipped cream or if you prefer an ultra-creamy texture․ Be careful not to overmix, as it can create air pockets and make the pudding too light․
- Individual Serving Cups or a Large Serving Dish: Once the pudding is prepared, you’ll need something to store or serve it in․ Individual serving cups are great for portion control and presentation, while a large serving dish works well for family-style servings․ Glass or clear plastic containers are recommended to showcase the pudding’s appearance․
- Refrigerator: Most instant puddings need to chill in the refrigerator to set properly․ Make sure you have enough space in your fridge to accommodate the bowl or serving containers․ The chilling process typically takes about 5 minutes for instant mixes but can vary depending on the recipe․
- Timer: If you’re heating the pudding on the stovetop or using a specific mixing time, a timer ensures you don’t overcook or overmix the mixture․ A simple kitchen timer or the timer on your smartphone will work perfectly․
- Storage Containers: If you’re not serving the pudding immediately, airtight storage containers are necessary to keep it fresh in the refrigerator․ Look for containers with tight-fitting lids to prevent air from entering and spoiling the pudding․
Having all these tools on hand will make the process of preparing instant pudding mix quick and efficient․ While some items are optional, they can enhance the final result and make the experience more enjoyable․ Always ensure your equipment is clean and sanitized before use to maintain food safety standards․ With the right tools, you’ll be ready to whip up a delicious pudding in no time!
Instructions:
Preparing instant pudding mix is a straightforward process that requires minimal effort but attention to detail to achieve the best results․ Below is a step-by-step guide to making delicious pudding using instant pudding mix:
- Gather Ingredients and Equipment: Before starting, ensure you have all the necessary ingredients and equipment ready․ This includes 2 cups of milk, 1 cup of instant pudding mix, a wire whip or whisk, a large mixing bowl, and optional flavor enhancers like vanilla extract or nutmeg․
- Pour Milk into the Mixing Bowl: Open the refrigerator and pour 2 cups of cold milk into the large mixing bowl․ You can use any type of milk, such as whole milk, 2% milk, skim milk, or even plant-based alternatives like almond or soy milk․ Ensure the milk is cold for the best results, as this helps the pudding mix dissolve evenly․
- Add the Instant Pudding Mix: Open the package of instant pudding mix and pour the entire contents into the bowl with the milk․ If you’re using a smaller packet (about 3․4 ounces), this should be sufficient for 2 cups of milk․ For larger batches, adjust the proportions accordingly․
- Whisk the Mixture: Take your wire whip or whisk and begin blending the mixture immediately․ Whisk vigorously in a circular motion, ensuring that the pudding mix dissolves completely into the milk․ This step is crucial to avoid lumps and achieve a smooth texture․ Continue whisking for about 2-3 minutes, or until the mixture becomes thick and creamy․
- Add Optional Flavorings: If you’re using vanilla extract, salt, or nutmeg, now is the time to add them․ Stir gently to incorporate these ingredients fully into the pudding mixture; Be careful not to overmix, as this can introduce air pockets and make the pudding too light․
- Chill the Pudding: Cover the bowl with plastic wrap or a tight-fitting lid and refrigerate the pudding for at least 5 minutes․ This allows the pudding to set and thicken further․ If you’re in a hurry, you can chill it for a shorter time, but the longer it chills, the creamier it will be․
- Serve: Once the pudding has chilled, give it a quick stir with your whisk or spoon to ensure it’s smooth․ You can serve it as is or garnish it with toppings like fresh fruit, whipped cream, or a sprinkle of cinnamon or cocoa powder․ For a more elegant presentation, pour the pudding into individual serving cups or a large serving dish before chilling․
For those who prefer a warmer pudding or need a more traditional approach, some recipes involve heating the mixture on the stovetop․ To do this:
- Combine Milk and Pudding Mix in a Saucepan: Pour 2 cups of milk and 1/2 cup of instant pudding mix into a medium saucepan․ Place the saucepan over medium heat and whisk constantly to prevent the mixture from sticking to the bottom․
- Bring to a Simmer: Continue heating and whisking until the mixture comes to a simmer․ Reduce the heat to low and let it cook for about 5 minutes, stirring constantly, until the pudding thickens to your liking․
- Remove from Heat: Once the pudding has reached the desired consistency, remove it from the heat and let it cool slightly before refrigerating․ This method gives the pudding a richer, more homemade flavor․

Tips for Success:
- Always use cold milk for instant pudding mix, as this helps the thickening agents work effectively․
- Whisk continuously when dissolving the pudding mix to prevent lumps from forming․
- Don’t overmix the pudding once it has thickened, as this can make it too airy or separate․
- Experiment with different types of milk and flavorings to create unique variations, such as chocolate pudding with coconut milk or vanilla pudding with a hint of cinnamon․
- If the pudding doesn’t thicken as expected, let it chill longer or add a little more pudding mix gradually, whisking until it reaches the desired consistency․
With these simple steps, you can create a delicious and customizable pudding that’s perfect for desserts, snacks, or even as a base for more complex recipes․ Whether you prefer the convenience of a cold mix or the richness of a heated pudding, instant pudding mix offers endless possibilities for creativity in the kitchen․

Tips:
When working with instant pudding mix, there are several tips and tricks that can help you achieve the best results and make your pudding-making experience more enjoyable․ Whether you’re a novice in the kitchen or an experienced cook, these tips will ensure your pudding turns out smooth, creamy, and delicious every time․
- Use Cold Milk: Always use cold milk when preparing instant pudding mix․ Cold milk helps the pudding mix dissolve evenly and prevents lumps from forming․ If you’re in a hurry, you can even chill the milk in the refrigerator for about 30 minutes before using it․ Avoid using warm or hot milk, as this can prevent the pudding from thickening properly․
- Whisk Continuously: Whisking is a crucial step in making pudding․ Use a wire whisk or an electric mixer to blend the milk and pudding mix thoroughly․ Start whisking as soon as you pour the pudding mix into the milk, and continue for about 2-3 minutes, or until the mixture becomes smooth and free of lumps․ Stop once the pudding starts to thicken to avoid overmixing․
- Avoid Overmixing: While whisking is essential, overmixing can lead to a pudding that’s too airy or even separate․ Once the pudding reaches the desired consistency, stop whisking․ If you’re refrigerating the pudding, let it chill undisturbed to allow it to set properly․
- Add Flavor Enhancers: Instant pudding mix is a versatile base that can be customized to your taste preferences․ Consider adding a teaspoon of vanilla extract, a pinch of cinnamon, or a sprinkle of nutmeg to give your pudding a unique flavor․ For a fruity twist, mix in some fruit jam or pureed berries after the pudding has thickened․
- Experiment with Thickeners: If you find that your pudding isn’t thickening as much as you’d like, you can add a little cornstarch or unflavored gelatin to help it set․ Mix the thickener with a small amount of cold milk before adding it to the pudding to avoid creating lumps․
- Chill Thoroughly: Refrigerating the pudding is an important step that ensures it sets properly and develops a creamy texture․ Chill the pudding for at least 5 minutes, but ideally for 30 minutes to an hour, before serving․ If you’re short on time, you can speed up the chilling process by placing the bowl over an ice bath․
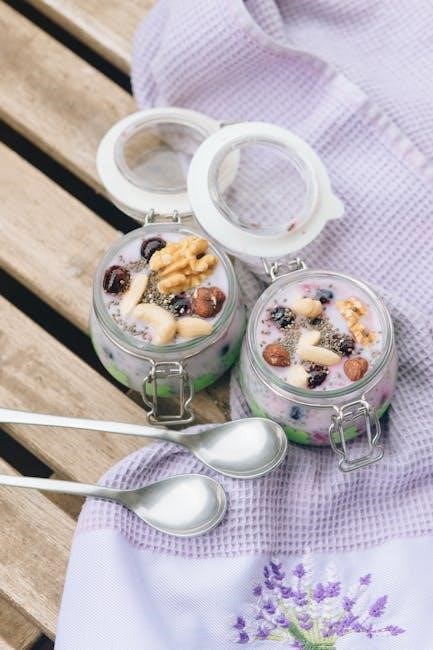
- Layer for Presentation: For a more elegant presentation, layer the pudding with whipped cream, fresh fruit, or granola in tall glasses or parfait dishes․ This not only makes the dessert visually appealing but also adds texture and flavor to each bite․
- Make Pudding Popsicles: Turn your pudding into a fun and refreshing treat by pouring it into popsicle molds and freezing it․ This is a great way to enjoy pudding during the summer months or as a healthy snack for kids․
- Store Leftovers Properly: If you don’t plan to eat the pudding immediately, store it in an airtight container in the refrigerator․ Pudding can be kept fresh for up to 3 days․ Give it a quick stir before serving to ensure it remains smooth and creamy․
- Troubleshoot Common Issues: If your pudding doesn’t thicken, check the expiration date of the pudding mix and ensure you used the correct ratio of milk to mix․ If the pudding is too thin, you can add a little more pudding mix gradually while whisking․ If it’s too thick, you can thin it out with a small amount of additional milk․
- Try Different Milk Types: While traditional recipes call for cow’s milk, you can experiment with alternative milks like almond, soy, or coconut milk for a dairy-free or vegan version of pudding․ Keep in mind that plant-based milks may affect the texture slightly, so you might need to adjust the amount of pudding mix or add a thickener like cornstarch․
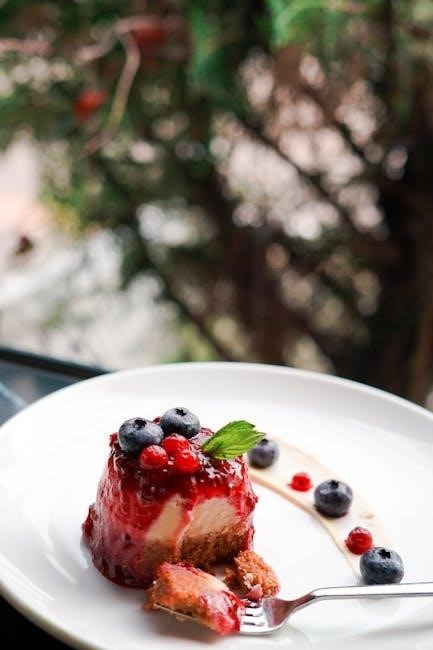
- Add Fresh Fruit: Incorporating fresh fruit into your pudding can enhance its flavor and nutritional value․ Try adding sliced strawberries, blueberries, or bananas to the pudding before chilling it․ For a tropical twist, mix in some diced mango or pineapple․
- Use Pudding as a Base: Instant pudding mix can be used as a base for more complex desserts․ For example, you can layer it with cake, fruit, and whipped cream to make a trifle, or use it as a filling for cream puffs or éclairs․ You can also mix it into cake or cookie batter for added moisture and flavor․
- Make Ahead: One of the convenient aspects of instant pudding is that it can be prepared ahead of time․ This makes it a great option for busy households or for preparing desserts in advance for gatherings or events․ Simply chill the pudding until you’re ready to serve it․
- Get Creative with Toppings: The toppings you choose can elevate your pudding from a simple dessert to a gourmet treat․ Consider using caramel sauce, chocolate shavings, toasted nuts, or even candy pieces to add texture and flavor to your pudding․ For a lighter option, top it with fresh fruit or a sprinkle of cinnamon․
By following these tips, you can ensure that your instant pudding mix turns into a delicious and memorable dessert․ Whether you’re making it for a family dinner, a party, or just a quick treat, instant pudding is a versatile and convenient option that can be tailored to your preferences and dietary needs․ With a little creativity and attention to detail, you can transform a simple mix into a culinary delight that everyone will enjoy․