

Orbit Sprinkler Timer User Manual: A Comprehensive Guide

Welcome! This detailed manual unlocks your Orbit timer’s potential, offering step-by-step guidance from initial setup to advanced features, ensuring efficient lawn care.
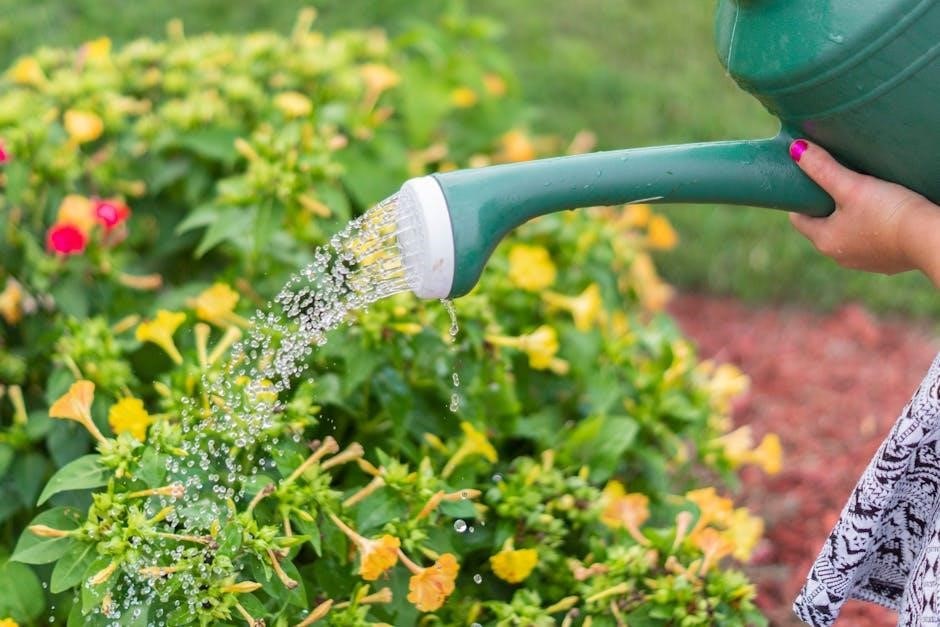
Orbit Sprinkler Timers represent a cornerstone of modern lawn and garden irrigation, offering homeowners a convenient and efficient method for automating their watering schedules. Designed with user-friendliness in mind, these timers eliminate the guesswork associated with manual watering, promoting healthy plant growth while conserving precious water resources. From basic mechanical models to sophisticated Wi-Fi enabled controllers, Orbit provides a diverse range of options to suit varying needs and budgets.
This user manual serves as a comprehensive guide to understanding and utilizing your Orbit Sprinkler Timer effectively. Whether you’re a first-time user or an experienced gardener, this resource will walk you through every stage – from initial installation and programming to troubleshooting common issues and performing routine maintenance. Embrace the simplicity and control that Orbit Sprinkler Timers bring to your outdoor watering experience, ensuring a lush, vibrant landscape with minimal effort.
Understanding the Benefits of Using a Sprinkler Timer
Employing a sprinkler timer delivers substantial advantages beyond simple convenience. Automated watering ensures consistent hydration for your lawn and plants, fostering robust growth and resilience. Crucially, timers drastically reduce water waste by delivering precise amounts at optimal times, aligning with environmental responsibility and lowering utility bills. Forget worrying about remembering to water or adjusting schedules – the timer handles it all!
Orbit Sprinkler Timers offer flexibility, allowing customized programs for different zones with varying needs. Features like rain delay and seasonal adjust further optimize water usage based on weather conditions. For frequent travelers, a timer provides peace of mind, guaranteeing your landscape remains healthy in your absence. Ultimately, a sprinkler timer is a smart investment, promoting a beautiful, thriving outdoor space while saving you time, money, and water.

Installation and Setup
Begin the process by carefully selecting a suitable location, mounting the unit securely, and correctly connecting it to your water supply and zone valves.
Choosing the Right Location for Your Timer
Selecting the ideal spot for your Orbit Sprinkler Timer is crucial for optimal performance and longevity. Prioritize a location that offers protection from direct sunlight and excessive rain; a shaded area is highly recommended. Ensure the timer is mounted within a reasonable distance of both a GFCI-protected electrical outlet (for electronic models) and your sprinkler valves, minimizing the length of wiring needed.
Avoid areas prone to flooding or standing water, as this can damage the internal components. Consider accessibility for programming and maintenance – you’ll need easy access to the timer’s interface. A garage, shed, or protected outdoor enclosure are excellent choices. The location should also allow for convenient access to the water supply line. Remember to check local codes regarding electrical installations near water sources before finalizing your timer’s placement.
Mounting the Orbit Sprinkler Timer
Securely mounting your Orbit Sprinkler Timer is essential for stable operation and protection from the elements. Most Orbit timers come with a mounting plate and screws designed for easy installation on a wall or sturdy post. Begin by selecting appropriate screws for your mounting surface – ensure they are suitable for exterior use if mounting outdoors.
Position the mounting plate at a comfortable height for access and programming. Use a level to ensure the plate is straight before drilling pilot holes. Securely attach the mounting plate to the surface using the provided screws. Carefully align the timer with the mounting plate and snap it into place, verifying it’s firmly attached. Double-check the stability of the mounted timer to prevent accidental dislodging, especially in windy conditions.
Connecting to the Water Supply and Valves
Proper connection to your water supply and sprinkler valves is crucial for a functioning system. First, always shut off the main water supply before beginning. Locate the point where your sprinkler system connects to the main water line. This is where you’ll install the Orbit timer.
Typically, you’ll need to cut the existing pipe and install fittings to connect the timer’s inlet and outlet. Ensure you use appropriate pipe fittings (PVC, threaded, etc.) compatible with your plumbing. Connect the water supply to the timer’s inlet, and then connect the outlet to the main sprinkler line. Finally, connect each zone valve to the corresponding terminal on the timer – careful labeling is key! Double-check all connections for leaks before restoring water flow.
Wiring the Zone Valves to the Timer
Accurate wiring is essential for controlling individual sprinkler zones. Begin by identifying the terminals on both the Orbit timer and your zone valves – typically labeled 1 through the number of zones. Using low-voltage sprinkler wire (usually 18-gauge), connect each valve’s common wire to the timer’s common terminal.
Then, connect each valve’s zone wire to its corresponding numbered terminal on the timer. Ensure secure connections; loose wires can cause malfunctions. If using a multi-program timer, verify you’re wiring to the correct program’s zone terminals. A wiring diagram included with your timer is invaluable. Double-check all connections before powering on the system to prevent shorts or damage.

Programming Your Orbit Sprinkler Timer
Unlock control! This section guides you through setting up watering schedules, utilizing the timer’s interface, and customizing options for optimal lawn hydration.
Understanding the Timer Interface and Buttons
Navigating your Orbit timer is key to successful programming. Most models feature a user-friendly LCD screen displaying the current time, date, and programmed schedule. Familiarize yourself with the primary buttons: ‘Set,’ ‘Program,’ ‘Start,’ and directional arrows (Up/Down/Left/Right). The ‘Set’ button typically initiates programming modes, allowing adjustments to time, date, and watering durations.
‘Program’ accesses the different watering schedules you can create. ‘Start’ manually activates a programmed schedule or initiates a manual watering cycle. Directional arrows navigate through menus and adjust values. Some advanced models include a ‘Cycle/Soak’ button for customized watering patterns and a ‘Rain Delay’ button to temporarily pause schedules. Refer to your specific model’s diagram – often printed on the timer itself – for precise button locations and functions. Understanding these controls empowers you to tailor watering to your lawn’s specific needs.
Setting the Current Date and Time
Accurate time and date are fundamental for proper scheduling. Begin by pressing the ‘Set’ button until the display shows ‘Date’ or a similar prompt. Use the Up/Down arrow buttons to adjust the month, day, and year, confirming each selection by pressing ‘Set’ again. Next, navigate to the ‘Time’ setting using the ‘Set’ button. Employ the arrow buttons to precisely set the hour and minute, ensuring AM or PM is correctly indicated.
Some models may require a separate button to toggle between 12-hour and 24-hour clock formats. Confirm your settings by pressing ‘Set’ one final time. A correctly set date and time ensures your programmed watering schedules activate at the desired times, optimizing water usage and lawn health. Double-check the display to verify accuracy before proceeding to program your watering schedules.
Programming Watering Schedules – Basic Settings
Begin by selecting a program (A, B, or C, if applicable). Press ‘Program’ and then the desired program number. Use the arrow buttons to choose a ‘Start Time’ – the time of day you want watering to begin. Next, set the ‘Watering Duration’ for each zone, indicating how long each valve will remain open, typically measured in minutes.
Select the ‘Days of the Week’ for watering; options usually include individual days, odd/even days, or specific groupings. Ensure you activate the program by confirming the settings with the ‘Set’ or ‘Enter’ button. Repeat these steps for each zone you wish to control. Remember to review your basic settings to confirm they align with your lawn’s watering needs and local water restrictions.
Advanced Programming Options: Cycle, Soak, and Manual Override
‘Cycle’ allows you to divide a long watering duration into shorter intervals, preventing runoff on sloped lawns. Activate this feature and specify the cycle length. ‘Soak’ enables water to penetrate the soil deeply by pausing watering between zones, ideal for clay soils. Configure the soak duration within the advanced settings.
The ‘Manual Override’ function provides immediate control, letting you start or stop watering regardless of the programmed schedule. This is useful for responding to unexpected rain or dry spells. Access this feature via a dedicated button or menu option. Remember to deactivate the manual override to resume scheduled programming. Explore these options to optimize water usage and lawn health.
Creating Multiple Watering Programs for Different Zones
Orbit timers often support multiple independent programs – A, B, and C are common designations – allowing tailored watering schedules for diverse landscaping needs. Utilize separate programs for your lawn, flowerbeds, and shrubbery, each with unique watering requirements. Within each program, assign specific zones to receive water according to customized start times and durations.
Access the programming mode and select a program (A, B, or C). Then, assign zones to that program and define their watering parameters. This granular control ensures optimal hydration for every area of your yard, promoting healthy growth and conserving water. Remember to clearly label each program for easy identification and future adjustments.

Features and Functionality
Explore advanced options! Orbit timers boast rain delay, seasonal adjust, and manual override features, providing ultimate control and water conservation for your landscape.
Rain Delay Function: How to Use It Effectively
Harness the power of weather awareness! The rain delay function is a crucial feature for conserving water and preventing over-saturation of your lawn. When inclement weather is predicted or occurs, activate this function to temporarily suspend your programmed watering schedule.
Typically, you’ll find options to specify the delay duration – often ranging from hours to several days – allowing you to customize the pause based on the forecast. Access the rain delay setting through your timer’s interface, usually via a dedicated button or menu option.
Remember to deactivate the rain delay once the weather clears to resume your regular watering program. Utilizing this feature responsibly contributes to efficient water management and a healthier, vibrant lawn, saving you money and resources. It’s a simple step with significant benefits!
Seasonal Adjust: Adapting to Changing Weather Conditions
Maximize water efficiency throughout the year! As temperatures fluctuate, your lawn’s watering needs change. The seasonal adjust feature allows you to globally increase or decrease watering durations across all zones, compensating for varying evaporation rates;
During hotter summer months, increase the percentage to deliver more water, while reducing it in cooler, wetter seasons. This prevents underwatering during peak heat and overwatering when rainfall is plentiful. Access this setting through your timer’s menu, typically expressed as a percentage adjustment (e.g., +10%, -25%).
Regularly review and adjust this setting to align with current weather patterns, ensuring your lawn receives optimal hydration without waste. It’s a proactive approach to maintaining a healthy landscape and conserving precious water resources.
Using the Manual Watering Feature
Need immediate irrigation? The manual watering feature provides on-demand control, overriding scheduled programs for instant zone activation. This is ideal for addressing localized dry spots, testing valve functionality, or providing extra hydration during unexpected heat waves.
Access the manual mode through your timer’s interface, selecting the desired zone and duration. The timer will run that zone for the specified time, then automatically revert to the programmed schedule. Remember to deactivate manual mode once finished to avoid unintended operation.
This feature offers flexibility and responsiveness, allowing you to fine-tune your lawn’s hydration as needed. It’s a convenient tool for maintaining a lush, healthy landscape, especially when conditions deviate from the norm.
Understanding Zone Duration and Start Times
Optimizing water usage hinges on precise control of zone duration and start times. Zone duration dictates how long each valve remains open, directly impacting water volume delivered to each area. Start times determine when watering begins, influencing effectiveness based on sunlight and evaporation rates.
Shorter durations suit smaller zones or clay-rich soils, while longer durations benefit larger areas or sandy soils. Early morning start times minimize water loss due to evaporation. Consider your local climate and plant types when setting these parameters.
Experimentation is key! Observe your lawn and adjust durations and start times accordingly. Proper configuration ensures efficient irrigation, promoting a healthy landscape while conserving water.

Troubleshooting Common Issues
Facing problems? This section provides solutions for typical issues like power failures, valve malfunctions, time discrepancies, and Wi-Fi connectivity problems—get your system back online!
Timer Not Powering On: Possible Causes and Solutions
Problem: Your Orbit Sprinkler Timer fails to display any signs of power, preventing operation and schedule execution. Several factors could contribute to this issue, requiring systematic troubleshooting.
Possible Causes: First, verify the power source. For battery-operated models, ensure fresh batteries are correctly installed, observing proper polarity. If using a plug-in adapter, confirm it’s securely connected to a functioning outlet and the timer itself. A tripped circuit breaker or blown fuse in your electrical panel could also be the culprit. Inspect the adapter for any physical damage, like frayed wires.
Solutions: Begin by replacing the batteries with new ones. Test the outlet with another device to confirm it’s working. Reset the circuit breaker or replace the fuse if necessary. Carefully examine the adapter for damage and replace it if found. If the timer still doesn’t power on after these steps, consult Orbit’s support resources or consider a replacement.
Valves Not Activating: Diagnosing the Problem
Problem: Despite a programmed schedule, one or more zone valves aren’t opening, resulting in dry spots on your lawn. This indicates a break in the communication between the timer and the valves, or an issue with the valves themselves.
Possible Causes: First, check the wiring connections at both the timer and the valve. Loose or corroded wires can interrupt the signal. Verify the valve solenoid is functioning correctly – a faulty solenoid won’t open the valve. A broken wire within the valve’s wiring can also cause this. Ensure the timer is correctly sending a signal to that specific zone.
Solutions: Carefully inspect and tighten all wire connections. Clean any corrosion from the wires and terminals. Test the valve solenoid with a multimeter (if you’re comfortable doing so). Replace damaged wires or the solenoid if necessary. Double-check your programming to confirm the zone is activated during the current schedule. If problems persist, consult a qualified irrigation professional.
Incorrect Time Display: Resetting the Clock
Problem: An inaccurate time display on your Orbit timer can lead to watering schedules running at the wrong times, potentially wasting water or harming your lawn. Ensuring the correct time is crucial for optimal performance.
Possible Causes: Power outages, low batteries (in battery-powered models), or accidental button presses can all cause the timer’s clock to drift or become reset. Some models may also have a setting for Daylight Saving Time that needs adjustment.
Solutions: Locate the “Set Time” or “Clock” button on your timer. Refer to your specific model’s instructions for the exact procedure. Typically, you’ll press and hold the button to enter time-setting mode, then use the up/down arrows to adjust the hour and minutes. Confirm your selection and exit the setting mode. If the issue persists, check the battery (if applicable) and replace it if needed. Verify Daylight Saving Time settings are correct.
Communication Errors (Wi-Fi Models): Troubleshooting Connectivity
Problem: If your Wi-Fi enabled Orbit timer loses connection, you won’t be able to control it remotely via the app or access online features like weather-based adjustments. Reliable connectivity is essential for smart functionality.
Possible Causes: Weak Wi-Fi signal, router issues, incorrect password entry, or interference from other devices can disrupt the connection. Also, ensure the timer is within range of your Wi-Fi network.
Solutions: First, check your router is functioning correctly and has internet access. Restart both the timer and your router. Re-enter your Wi-Fi password in the timer’s settings (using the app). Move the timer closer to the router if possible. Reduce interference by moving other wireless devices away. Consult Orbit’s support website for model-specific troubleshooting steps and firmware updates.

Maintenance and Care
Protect your investment! Regular care, including winterization, cleaning, and timely battery changes, will maximize the lifespan and performance of your Orbit timer.
Winterizing Your Orbit Sprinkler Timer
Preparing for freezing temperatures is crucial to prevent damage. Before the first frost, disconnect the timer from the water supply and valve wires. Thoroughly drain all water from the timer’s enclosure and any connected pipes. Remove the timer from its mounting location if it’s exposed to harsh weather.
If your timer has a battery backup, remove the batteries to prevent corrosion during prolonged storage. Store the timer in a dry, sheltered location, such as a garage or shed, where it won’t be subjected to freezing conditions.
Consider covering the valve connections with insulation to further protect them from freezing. Remember to re-install and reconnect everything in the spring before resuming your watering schedule. Proper winterization ensures your timer is ready for another season of reliable operation, saving you potential repair costs and headaches;

Cleaning the Timer Enclosure

Regular cleaning maintains optimal performance and extends the lifespan of your Orbit sprinkler timer. Before cleaning, always disconnect the timer from the power source – either unplug it or remove the batteries. Use a damp cloth with mild soap to gently wipe down the exterior of the enclosure. Avoid abrasive cleaners or harsh chemicals, as these can damage the plastic casing and electronic components.
Pay particular attention to removing dirt, dust, and debris that may accumulate around the buttons and display screen. For stubborn grime, a soft brush can be helpful. Ensure the enclosure is completely dry before reconnecting the power.
Do not submerge the timer in water or spray water directly into the unit. A clean enclosure helps prevent corrosion and ensures clear visibility of the timer’s settings, contributing to its long-term reliability.
Battery Replacement (If Applicable)
If your Orbit sprinkler timer utilizes batteries as a power source or for backup, regular replacement is crucial for uninterrupted operation. Check the battery compartment periodically for signs of corrosion or leakage. When replacing batteries, always use the correct type and size as specified in the timer’s specifications – typically AA or AAA alkaline batteries.
Remove the old batteries and install the new ones, ensuring correct polarity (+ and -). It’s recommended to replace all batteries at the same time, even if only some appear depleted. After battery replacement, reprogram the timer’s date and time to ensure accurate scheduling.
Dispose of used batteries responsibly, following local regulations for battery recycling. Maintaining fresh batteries safeguards your watering schedule and prevents data loss.
Extending the Lifespan of Your Timer
To maximize the longevity of your Orbit sprinkler timer, consistent preventative maintenance is key. Protect the timer from direct sunlight and extreme weather conditions whenever possible; consider a shaded location or protective cover. Regularly inspect the enclosure for cracks or damage, and promptly address any issues to prevent water intrusion.
Keep the timer clean by wiping down the exterior with a damp cloth. Avoid using harsh chemicals or abrasive cleaners. During winter months, properly winterize the system to prevent freeze damage – detailed instructions are found in the ‘Winterizing’ section.
Ensure proper wiring connections and avoid over-tightening screws. Following these simple steps will contribute to years of reliable performance from your Orbit timer.